Sizing a poster of Amsterdam is not a matter of taste. It is a matter of geometry. The city itself is a geometry problem — a river-fed lattice of concentric canals drawn from the IJ inland, mapped in our studio from OpenStreetMap data under the Overpass API. A print of that lattice has to survive the same test any drawing does on a wall: it has to be read from where you actually stand. This guide is a flowchart in prose. We will ask three questions — about wall width, viewing distance, and framing — and route you to a dimension that works. No taste required.
Question 1: How Wide Is the Wall the Print Will Live On?
Before anything else, measure the wall. Not the room. Not the furniture below it. The uninterrupted vertical plane the print will occupy, edge to edge, in centimetres.
This question comes first because it sets a ceiling that nothing downstream can overrule. A print that swallows its wall reads as pressure. A print that floats in the middle of a large plane reads as an afterthought. The interior design convention — and it is a convention, not a law, but it is a useful one — is that a single framed image should occupy between 55 and 75 percent of the wall's width. Below 55 percent, the wall dominates the image. Above 75 percent, the wall disappears and the image begins to feel wallpapered.
For Amsterdam, this matters more than for most cities. The map's readability depends on the concentric canals — the Singel, the Herengracht, the Keizersgracht, the Prinsengracht — being individually distinguishable. Compress the print too small on a wide wall and the four rings collapse into a single grey band. That is a failure of geometry, not of design.
If Yes — the wall is wider than 200 cm (roughly 6.5 feet or more)
You are in gallery territory. This is a wall behind a sofa, a bed, a long console. The print needs to be at least 70 × 100 cm to hold its own, and can comfortably scale to 100 × 140 cm or larger. At this size the four canal rings render at roughly 3 mm of separation each — enough that a reader standing two metres away can trace the Prinsengracht from the Brouwersgracht down to the Amstel without squinting. Anything smaller than 70 × 100 cm on a wall over 200 cm reads as under-committed.
If No — the wall is between 90 and 200 cm
This is the standard residential wall: above a desk, beside a doorway, in a hallway, over a chest of drawers. The working range here is 50 × 70 cm to 70 × 100 cm. The 50 × 70 format is the European standard and the size the studio prints most often for a reason — it holds the full canal grid down to individual bridge crossings and still fits proportionally on a 140 cm wall. Go smaller than 50 × 70 on a wall of this size and the map loses its cartographic weight; go larger than 70 × 100 and you begin fighting the wall's edges.
If the wall is under 90 cm, you are working with a small vertical slice — a corner between two doors, a narrow section of hallway. The 30 × 40 cm or A3 (roughly 30 × 42 cm) format is the honest answer. Below 30 cm on the long edge, a city map of Amsterdam stops being a map of Amsterdam and starts being a token of one.
Question 2: How Far Will You Stand From It Most of the Time?
Viewing distance is the second axis, and the one most people ignore. The wall dictates maximum size. The viewing distance dictates minimum size — the smallest a print can be and still be read as information rather than decoration.
The working rule from art conservation, used by curators when hanging in gallery spaces, is that the diagonal of a framed piece should be roughly equal to the average viewing distance. A print with a 100 cm diagonal — that is a 70 × 100 cm poster, whose diagonal measures 122 cm — reads correctly at about one to one and a half metres. Beyond two metres, its detail begins to compress. At three metres, its finer streets vanish.
The Amsterdam map is unusually distance-sensitive because its subject is a network, not a silhouette. A poster of the Eiffel Tower survives being seen from across a room because the shape carries the meaning. A poster of Amsterdam's canal belt is meaningless if you cannot count the rings. That count is what sets the minimum size at each viewing distance.
If Yes — most viewing happens at more than 2 metres
This is the living-room case: a sofa across from the wall, a dining table on the opposite side, a bed placed across a bedroom. At this distance you need the diagonal to be at least 120 cm, which means 70 × 100 cm as a floor. If the primary viewing point is three metres or more away — a large open-plan room, a stairwell landing seen from below — push to 100 × 140 cm. The canals need to be legible at the distance where you actually look at them, not the distance where you notice them exist.
If No — most viewing happens within 2 metres
This is the desk, the hallway, the entryway, the narrow bedroom. The observer is close, and the print's job is rewarding a slow read. Here the working range is 30 × 40 cm to 50 × 70 cm. At 30 × 40 cm and one metre of viewing distance, individual streets in the Jordaan resolve cleanly. At 50 × 70 cm and one and a half metres, the annotations on named canals become part of the reading rather than a caption. Going larger in a close-viewing context is not wrong — it is simply wasted resolution. The eye cannot take in a 100 cm print from 80 cm away.
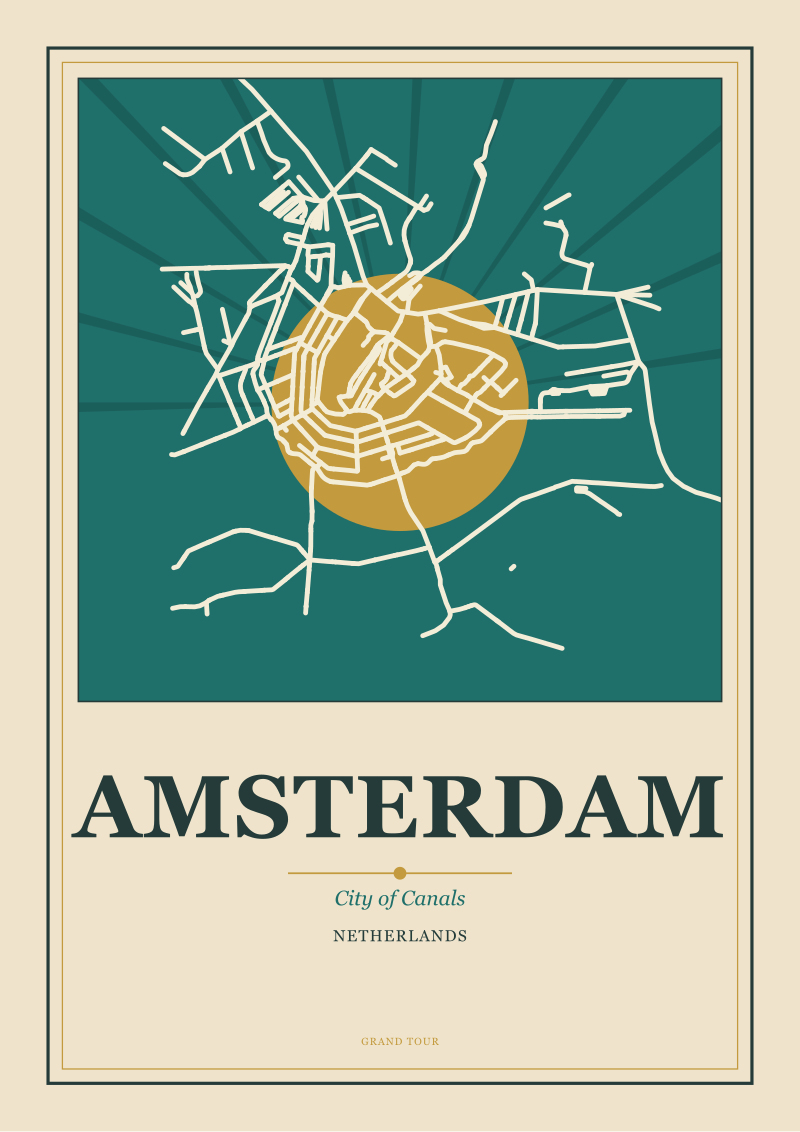 Amsterdam
The print from this article · from €29.95
View the print →
Amsterdam
The print from this article · from €29.95
View the print →
Question 3: Are You Framing It, or Hanging It Unframed?
The third question is the one that changes the answer to the first two. A framed print occupies more wall than a print alone, and it does so in a specific and measurable way.
A frame adds width. A standard European gallery frame — the profile the studio recommends — adds between 3 and 5 cm of frame on each edge. A window mat, if you use one, adds another 5 to 8 cm on each edge. A 50 × 70 cm print inside a 5 cm frame with a 6 cm mat becomes a 72 × 92 cm object on the wall. That is not a rounding error. It is 44 percent more surface area.
The framing decision also changes the print's visual weight relative to the wall. Frames add contour. A framed print holds its edges precisely; an unframed print, hung with magnetic rails or pins, feels lighter and more provisional. The two are not interchangeable, and the size question has to be answered against whichever you are actually going to do.
If Yes — you are framing it, with or without a mat
Subtract the frame and mat allowance from your wall's usable width before choosing a size. On a 140 cm wall, applying the 65 percent occupancy convention, you have 91 cm of visual width to work with. A 50 × 70 cm print framed with a mat lands at 92 cm wide — exactly the ceiling. A 70 × 100 cm print framed the same way lands at 112 cm and will overrun. If you want the framed 70 × 100 look, your wall needs to be at least 170 cm wide. This is where most sizing errors happen — buyers spec the print size, not the framed size.
If No — you are hanging it unframed, flush to the wall
You have your wall's full usable width to work with, and you can push the print one size up from what a framed version would allow. On the same 140 cm wall where a framed 50 × 70 was the ceiling, an unframed 70 × 100 works cleanly, occupies 71 percent of the wall's width, and reads at the correct visual weight. The trade-off is edge finish: unframed prints show their edges, so the paper stock and the print's border matter more. This is a preference call. Neither route is wrong.
If You Answered Everything: The Size Map
Three binary questions produce eight combinations. Each maps to a specific size recommendation. The table below is the whole flowchart collapsed into a single reference.
| Q1: Wall > 200 cm? | Q2: Viewing > 2 m? | Q3: Framing? | Recommendation |
|---|---|---|---|
| Yes | Yes | Yes | 70 × 100 cm framed with mat — occupies ~112 cm framed width. |
| Yes | Yes | No | 100 × 140 cm unframed — the gallery answer, full canal detail readable across the room. |
| Yes | No | Yes | 50 × 70 cm framed — close viewing on a large wall reads as a considered choice, not a small print. |
| Yes | No | No | 70 × 100 cm unframed — one size up from close-viewing minimum, exploits the wall without overreach. |
| No | Yes | Yes | 50 × 70 cm framed with mat — the residential standard, tuned for sofa or bed viewing distance. |
| No | Yes | No | 70 × 100 cm unframed — pushes the wall to its usable ceiling and holds the canal legibility at 2 m+. |
| No | No | Yes | 30 × 40 cm framed — hallways, desks, narrow bedrooms; frame adds presence without swallowing the wall. |
| No | No | No | 50 × 70 cm unframed — the honest residential answer, close-read from 1 to 2 m. |
Two combinations converge on 70 × 100 cm unframed. That is not an error in the table. It is what the geometry actually says: the moment either the wall or the viewing distance pushes into the upper band, and the print is going up without a frame, the 70 × 100 format is the load-bearing size for the Amsterdam map. It is the size at which the four concentric canals render at roughly 2.2 mm of separation each, readable at two metres, and at which the Amstel remains distinct from its northern tributaries down to the level of individual bridges.
The 50 × 70 format does most of the residential work in the table for the same reason. It is the size at which a full Amsterdam grid — from the IJ waterfront down to De Pijp — can be printed at a scale where a viewer standing one and a half metres away can read named canals without leaning in. Anything smaller starts losing information the map exists to carry. Anything larger starts fighting the walls most people actually have.
We have not addressed three things worth naming. This guide does not cover pairing an Amsterdam print with a second print — diptych and triptych sizing is a separate geometry problem with its own conventions and we will treat it directly. It does not cover print orientation on non-standard wall shapes — sloped ceilings, alcoves, walls interrupted by radiators or trim — where the visual width calculation changes. And it does not cover paper stock and framing profile choice, which affect the print's visual weight but not its dimensions. Each of those is its own question. This one was only about size.
FAQ
What is the most popular Amsterdam print size for a home?
Across our shop, the 50 × 70 cm format sells the most, and the reason is structural rather than aesthetic. It is the European standard size, it fits the majority of residential walls between 90 and 200 cm wide at the correct 55–75 percent occupancy, and it holds the full Amsterdam canal grid at a scale readable from typical living-room and bedroom viewing distances. The 70 × 100 cm format is the next most common, chosen for larger walls or open-plan spaces.
How do I measure the usable width of a wall for a print?
Measure the wall edge-to-edge in centimetres, then subtract any obstructions the eye reads as boundaries — a doorframe, the top of a headboard, the edge of a mounted shelf. What remains is the usable width. Multiply that number by 0.65 to get your target framed-object width. That is the number you compare against print dimensions, not the raw wall measurement. Most sizing errors come from measuring the room instead of the visual plane.
Does a framed print really need to be smaller than an unframed one?
Not smaller as a print — smaller in the print dimension you order, so that the framed object lands at the right final width. A 5 cm frame with a 6 cm window mat adds 22 cm of width to a poster. On a 140 cm wall, that difference is the gap between a print that fits and one that runs into a light switch. The frame is not decoration on top of the print; it is part of the object's footprint.
Can I hang a small Amsterdam print on a large wall if I like the size?
You can, but the map stops functioning as a map at a certain wall-to-print ratio. Below roughly 40 percent width occupancy the image reads as a token, and Amsterdam specifically loses the canal-count that gives it meaning. If you want a small print on a large wall for compositional reasons, pair it with a second element — a shelf, a lamp, a second print — so the visual group hits the 55–75 percent range even if the single piece does not.
What is the minimum viewing distance for the largest Amsterdam prints?
For a 100 × 140 cm print, the closest useful viewing distance is around one and a half metres. Closer than that, the eye cannot take in the full composition and you are looking at fragments of the map instead of the map. This is why gallery-scale prints belong on walls opposite a seating area or across a room, not in narrow hallways where you pass within half a metre of them.
Do the canal rings really disappear at smaller sizes?
Below 30 cm on the long edge, the four concentric canals — Singel, Herengracht, Keizersgracht, Prinsengracht — begin printing at under 1 mm of separation each. At normal viewing distances they merge visually into a single grey ring. The Amsterdam map still reads as Amsterdam, but the specific geometry that makes the city drawable — the concentric lattice extending inland from the IJ — is lost. That is why the studio does not print below A3 for this subject.
Should the print's orientation match the wall's orientation?
Generally yes. Amsterdam's canal belt is roughly semicircular and prints comfortably in either portrait or landscape, but the format should follow the wall's dominant axis. A tall wall — beside a doorway, in a stairwell — wants a portrait print. A wide wall — behind a sofa or bed — wants landscape. Fighting the wall's orientation is possible but requires the print to be sized down further to compensate, and usually reads as a compromise.
Does paper stock affect what size I should order?
No. Paper stock affects tactile weight and light behaviour — a matte fine art paper reads heavier than a satin poster stock at the same size — but it does not change the geometric answer. The three questions in this guide resolve to a dimension regardless of paper. Paper is the next decision, made after size is settled, and the studio's default archival matte stock works across the full size range without adjustment.



New city prints and 10% off your first order.
One email now with your code. No noise after.